Trade Secrets à la Koval. Crochet Symbol Charts with Adobe Illustrator CS5
| February 26, 2012 | Filled under My Book, Trade Secrets à la Koval, Writing a book |
Even if I get asked a lot about how I draw my crochet diagrams, just about a week ago I started to use Adobe Illustrator and I really can’t describe how I’m happy with this drawing software and with a new and exactly look of my diagrams I wanted!! And as I promised, I’m so glad to share some helpful links and tips, which helped me a lot. So, let’s go!
Get started
If you don’t have this software, you may want to try trial version of Adobe Illustrator® CS5 first, which is fully functional and offers every feature of the product for you to test-drive. To get started, I would highly recommend Illustrator CS5 Essential Training by lynda. Take your time to watch this course, which includes a detailed explanation of the elements that make up vector graphics, and shows how to use each of Illustrator’s drawing tools. It’s really matters to pass first learning bumps and get comfortable with Ai tools first of all.
Creating crochet charts
To create the charts you will need a library of crochet symbols first of all. You have two options: create your own or purchase a crochet font like StitchingCrochet (or ready-made library if any is available for sell). Below are links to amazing video tutorials how to create diagrams in rounds using StitchinCrochet font by BayviewPaula (sure this technique will work for your custom created symbols too):
StitchinCrochet Tutorial: Part 1
StitchinCrochet Tutorial: Part 2
StitchinCrochet Tutorial: Part 3
StitchinCrochet Tutorial: Part 4
StitchinCrochet Tutorial: Part 5 (final)
Many thanks to Paula for such helpful and clever tutorials! It’s really everything you need to know for creating your very first crochet charts.
Making a library of crochet stitch symbols
Creating your own library of stich symbols makes a sense for several reasons:
- Custom style (stroke weight, cap, corners, etc.)
- Flexibility of work with symbols (to transform, change proportions):

![]()
- Ability to create any customs groups of symbols like petals, shells, etc.
- Create all symbols you needed (StitchingCrochet has most of them, but not all). Well, you may use both: font and partial library to adjust styles.
- Using cool tools (like Blend tool), which doesn’t work with fonts.
Amie, from Nexstitch, has great detailed tutorials on using Adobe Illustrator to create symbols and diagrams on her blog.
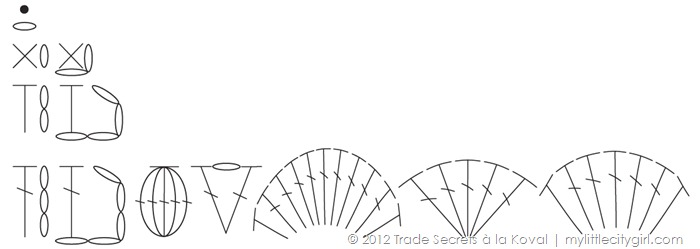
Below is a part of my library of symbols, which were created with Line Segment tool ![]() and Ellipse tool
and Ellipse tool ![]() . Make sure the symbols have same Width (mine are 25 px wide) and proportional Height values (sc – 25 px, hdc – 50 px, dc – 75 px, etc.). New Width and Height values can be specified in the Control panel at any time if needed.
. Make sure the symbols have same Width (mine are 25 px wide) and proportional Height values (sc – 25 px, hdc – 50 px, dc – 75 px, etc.). New Width and Height values can be specified in the Control panel at any time if needed.
Creating Shells
Probably there are other and more easy ways to do that, but so far I made Shells by using Envelope Distort.
[one_half]
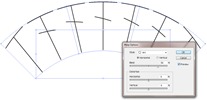
[dropcap]1[/dropcap] Create a group of 5 dc and 2 hdc, transformed as shown below (click pictures to enlarge).
[/one_half]
[one_half_last]
[dropcap]2[/dropcap] Select all elements with Selection tool ![]() and go to Object > Envelope Distort > Make with Warp. In the Warp Options dialog box, select a warp style Arc. Click Preview check box to see the changes.
and go to Object > Envelope Distort > Make with Warp. In the Warp Options dialog box, select a warp style Arc. Click Preview check box to see the changes.
[/one_half_last]
[one_half]
[dropcap]3[/dropcap] Change Bend and Vertical Distortion parameters to get shape close to this (Blend: 30%, Vertical: –34%).
[/one_half]
[one_half_last]
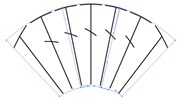
[dropcap]4[/dropcap] Adjust size as desired. To reshape the envelope, drag any anchor point on the envelope with the Direct Selection tool ![]() if needed.
if needed.
[/one_half_last]
Creating charts of a row projects
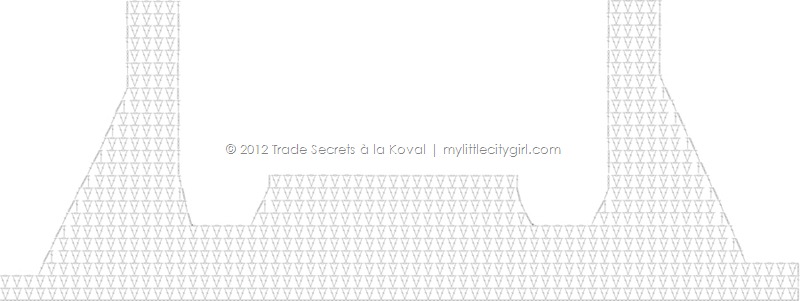
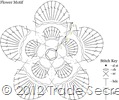
I work on Sunlit Rose Bolero pattern now and will show you one of the ways how to create diagram in rows, especially if row is 193 sts wide.
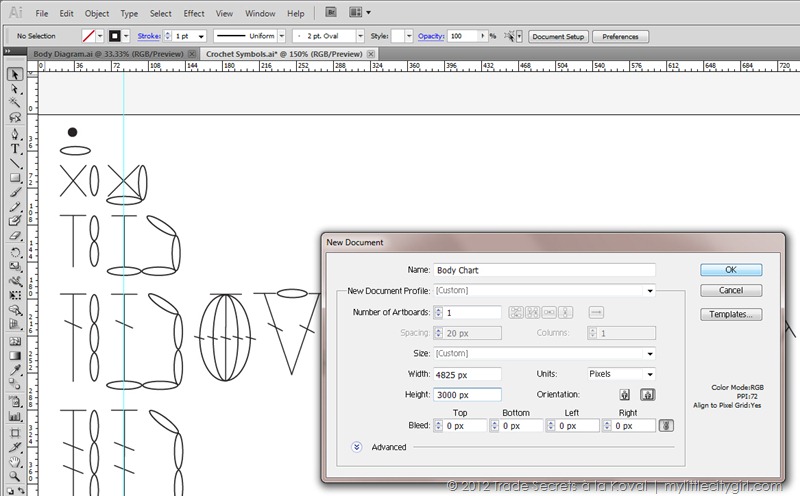
NOTE: I work on a PC in Adobe Illustrator CS5. The set up on a Mac looks a little different and the keyboard shortcuts are different too.
[dropcap]1[/dropcap] Open up a new document File > New. Call it “Body Chart” for example.
Set up options:
- New Document Profile. Choose Custom.
- Size of document. To calculate a Width of document (important for Blend tool), simple multiply a width of ch (25 px) by number of chains (194): 25 px x 193 = 4825 px. For a High – set up 3000 px (it can be easy changed at any time if needed). Click OK.
[dropcap]2[/dropcap] Creating beg ch of 193 chs with Blend Tool.
First, start out by copy (Control + C)/pasting (Control + V) a chain stitch from a library of symbols to Body Chart document. Mine is called Crochet Symbols.ai (see screenshot below – highlighted in green). Zoom in to see it closer (look in the bottom, left corner of the workspace). Select a chain stitch with Selection tool ![]() and move a chain to lower left corner by set up next options:
and move a chain to lower left corner by set up next options:
- Reference Point (click at lower left corner of Reference Point icon)
- Set up X and Y value: X=0 px; Y=3000 px . This first chain is start of the blend.
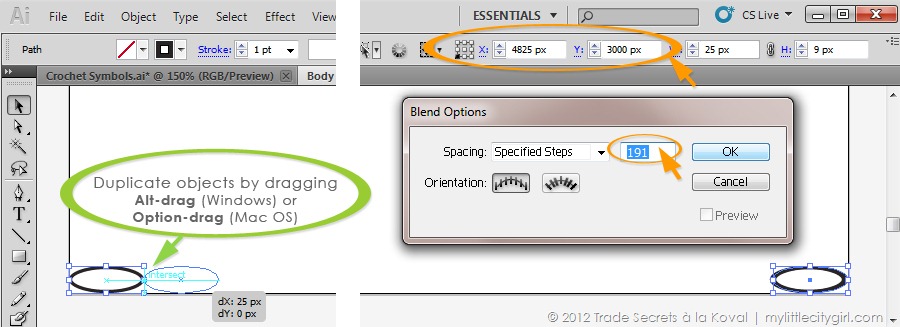
[dropcap]3[/dropcap] Duplicate a chain by pasting (Control + V) or by dragging (my absolute favorite tool so far!): select a chain and Alt‑drag (Windows) or Option-drag (Mac OS) the selection. Set up for second chain (end of the blend): X=4800 px (4825 – 25); Y=3000 px. Set blending options by double-clicking the Blend tool ![]() or choosing Object > Blend > Blend Options. Spacing determines how many steps are added to the blend. Choose Specified Steps and set up 191 (2 chains we have already). Click OK.
or choosing Object > Blend > Blend Options. Spacing determines how many steps are added to the blend. Choose Specified Steps and set up 191 (2 chains we have already). Click OK.
[dropcap]4[/dropcap] Select both objects (chains). Choose Object > Blend > Make. Beginning chain is complete. Change layer name to Ch 193 or Beg Ch. Block layer to prevent any accidental changes (optional).
Some more ideas of using Blend tool. Add new layer. Rep steps 2-3, but with dc stitch and set up Spacing > Specified Steps = 95. Then choose Object > Blend > Make. You will get dc located in “every other” order.
Then create new layer. Rep steps steps 2-3, but with chain stitch placed between first two (X=25 px) and last two dc (X=4800 px). Set up Spacing > Specified Steps = 94. Then choose Object > Blend > Make. You got a row of Mesh pattern in a minutes, don’t you! Yes, you are right – here should be a beginning ch-4, but I’m not finished ;o) So, let’s go back to our Body Chart.
[dropcap]5[/dropcap] To add beg ch-3, you need to resize the artboard (add extra width value to the right). Select the Artboard tool ![]() , click to select an artboard. To resize the artboard, position the pointer on an edge or corner until the cursor changes to a double-sided arrow, and then drag to adjust. Or, specify new Width and Height values in the Control panel.
, click to select an artboard. To resize the artboard, position the pointer on an edge or corner until the cursor changes to a double-sided arrow, and then drag to adjust. Or, specify new Width and Height values in the Control panel.
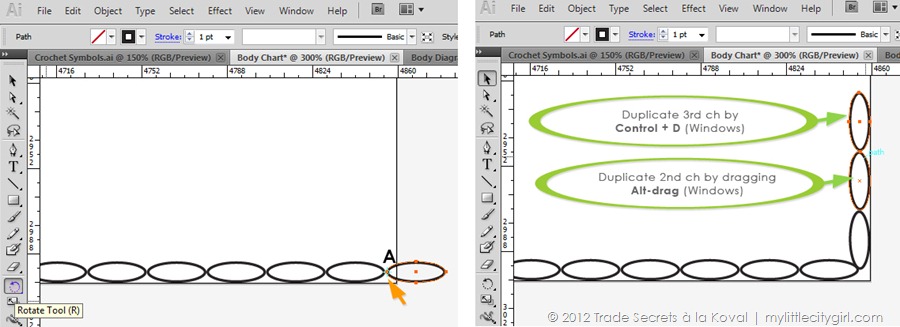
[dropcap]6[/dropcap] Add new layer and name it Row 1. Copy (Control + C)/pasting (Control + V) a chain stitch from your “library of symbols” to Body Chart document. Align a chain stitch to the beg chain (you should see the word, “intersect” in blue).
Select the Rotate tool ![]() .
.
- To rotate the chain around point A, click once in the document window in point A to reposition the reference point. Then move the pointer away from the reference point and drag in a circular motion, holding down Alt (Windows) after you start to drag.
- Duplicate 2nd chain by dragging Alt-drag (Windows).
- Duplicate 3rd chain by pasting (Control + D). Group beg ch-3.
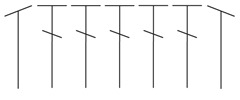
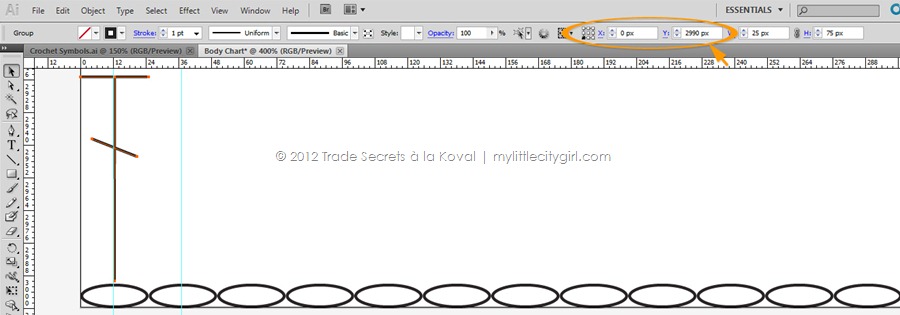
[dropcap]7[/dropcap] Copy (Control + C)/pasting (Control + V) a dc stitch (Wight value = 25 px, Height value = 75) from a library of symbols to Body Chart document. Set up: X=0 px, Y= 2990 px.
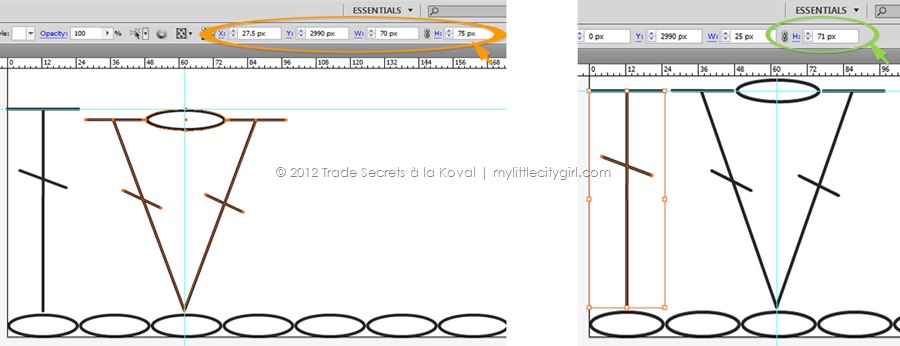
[dropcap]8[/dropcap] Copy (Control + C)/pasting (Control + V) a V-st stitch (Wight value = 75 px, Height value = 75) from a library of symbols to Body Chart document. Set up: X=25 px, Y= 2990 px. Adjust Width and Height values of V-st: Width = 70 (to make a space between V-st symbols of 2.5 px from each side); Height = 75 px. Adjust Height value of dc: Height = 71 px.
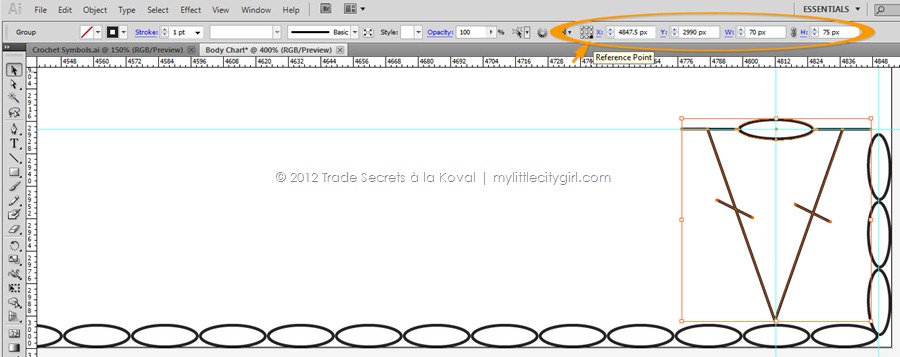
[dropcap]9[/dropcap] Duplicate V-st by dragging Alt-drag (Windows). Change Reference Point by clicking at right lower corner of Reference Point icon. Set up for V-st: X=4822.5 px, Y= 2990 px.
[dropcap]10[/dropcap] Set up blending options: Spacing > Specified Steps = 62. With Selection tool ![]() select both V-sts. Then choose Object > Blend > Make. To make second row, duplicate layer Row 1 and change beg sts. To make short rows, duplicate 1st V-st by dragging Alt-drag (Windows) and then duplicate symbol as many times as need by Ctr + D.
select both V-sts. Then choose Object > Blend > Make. To make second row, duplicate layer Row 1 and change beg sts. To make short rows, duplicate 1st V-st by dragging Alt-drag (Windows) and then duplicate symbol as many times as need by Ctr + D.
Looks as I’m completely hooked! ;o) To be continued…
[quote author=”- Amy Chua”] Nothing is fun until you’re good at it. [/quote]






 Shopping Cart




Bookmarked! Thanks Alla :)
my pleasure Novi!!
So awesome Alla! Thanks for the tutorial! :D
You are welcome! :)
Hi Alla. I have just discovered your wonderful talent. You are incredible!!! You are extremely inspiring. Thank you so much.
Thank you so much Claudette!
you are AWESOME!
i just discovered the joy and fun of Illustrator and I have been crocheting for a long time. I have some old patterns from the magz I need to enlarge due to their very-low resolution… thought of also practicing to make my OWN pattern :) thank YOU!
Thanks so much for this great idea and tutorial. I am going to use Corel Draw , but there are not that many differences with Adobe Illustrator so I hope it will be OK :)
I just found this tutorial today because I had the same general idea to use Illustrator to make charts.
I have one tip to add to make doing this even easier to build the library of symbols. Use the TTF of the symbols. Type out each one in AI. Select all. Right click, choose Create Outlines. This will make all of the font symbols into objects.
Anything that has multiple pieces that do not touch will have to be grouped together as one object to keep them together when moving. Select desired objects then push Ctrl + G to group.
Thank you so much Frank for sharing!!
Thank you so much for this! I am hoping you have another tutorial that describes how to create a 3-dc cluster? Or that you would be willing to explain or share a how-to resource, please?
Thank you so much Lisa for your interest!! You are reading my mind ;) You will be surprised, but last couple weeks, I learn how to record videos from my Adobe Illustrator to show you the process. Please allow me some time to discover this new stuff for me!