Category: My Book
Imagical Seasons™ | You Made This!
| March 22, 2016 | Filled under Marketing, My Book, You made this |
I am so grateful for your interest in my work! You are welcome to leave your reviews and comments here or on ImagicalSeasons.com.
Please share pictures of your completed creations – you are my boundless inspiration!!!


Thank you so much!! You are awesome!!
_______________________
To look inside Imagical Seasons™ crochet pattern books, please visit my Amazon store. The books are available at:

![]()

![]()
A lovely and wonderful day everyone!!
Imagical Seasons™ Crochet Pattern Books | ♥ A Special Deal For You!!
| February 3, 2016 | Filled under FB page, Featured, Holidays, Marketing |

I just realized that it’s very first time when I wrote a post at Imagical Crochet Creations facebook’s page, and totally forgot to share it here. Oh my, I can’t believe it!
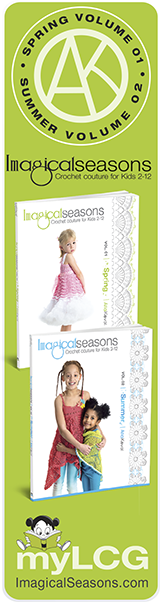
So, just in time for Valentine Day and coming Spring/Easter…
A book always makes a fantastic gift, and crochet pattern books for crafters are not exclusion! ;o) Let me introduce Imagical Seasons™ pattern book series available in paperback, digital and Kindle formats! Plus, ♥ I have a SPECIAL DEAL FOR YOU: get 30% off on entire purchase exclusively at ImagicalSeasons.com! Offer valid now through Wednesday, February 10, 2016 at 11:59pm PST. No code needed.
To look inside the books, please make sure to check my Amazon store; To find the book in both PDF and PAPERBACK formats, please visit my site: http://imagicalseasons.com/; The books are also available at Etsy and Ravelry.
![]()
![]()
6 Weeks of Gifting and Giveaways | Week #4!
| December 7, 2015 | Filled under Giveaway, Marketing |

Can you believe 4th week is here already! Thank you so much everyone for sharing your favorite places to knit and crochet! It was interesting to know! I also love knit/crochet in a car while my husband driving especially during our long trips. Oh, and I am so glad you liked Loop of Jade Cowl! YAY!! ;o) Thank you so much!!
The Winner of Giveaway#3 is ….. Shelley Cooper (comment #23)! My congratulations Shelley! I’ll contact you shortly!

WEEK #4
This week I would love to offer you two crochet patterns in one, which is available to download for free from now until December 13th, 2015 at 11:59 pm PST.

Hugs of Love Blanket
Give Baby the sweetest of sleep and the best of dreams with this lovely and unbelievably luxurious afghan. Delicate crochet shells come together to create billows of heavenly softness, just right for baby’s sensitive skin. Charming and snugly, this blanket will inspire hours of cuddles, wrapping your cutie in cozy comfort!
IMAGINE THIS: It’s a perfect gift for boys and girls alike—just trim it in blue, pink, or any color of your choice, and watch little eyes grow wide in delight before Baby snuggles into the clouds for a nap. Crochet it with crochet thread and turn this cuddly blanket into an eye-catching tablecloth.
Tutti Frutti
Welcome Spring’s arrival with this delightful blanket!
A colorful and happy fruit-ruffled blanket that can be worked up in any size you desire. Rows of ruffles were made in delicious peach, yellow and lime to create the featured blanket; it will look equally stunning in colors of your choice. The blanket is soft and comfortable yet sturdy enough for beach and outdoor use. It’s sure to be an all-time favor.
IMAGINE THIS: Crocheted from the center, this pattern is easily adjustable to make a fun pillow or even a tablecloth – you name it!

SKILL LEVEL: Intermediate
FINISHED MEASUREMENTS
39” (99 cm) square
YARN:
Hugs of Love Blanket: DK weight (#3 Light).
Shown: Omega Trigo (100% cotton; 295 yd [270 m]/3.5 oz [100 g]): 5 balls of #201 white.
For contrasting trims: Omega Perle (100% mercerized cotton; 178 yd [163 m]/1.76 oz [50 g]): 1 ball each of #520 light pink, #518 light yellow, #528 light green.
Tutti Frutti Blanket: DK weight (#3 Light).
Shown: Omega Fontana (100% mercerized cotton; 219 yd [200 m]/3.5 oz [100 g]): 3 skeins of #632 salmon, 3 skeins of #683 green apple, 2 skeins of #604 canary.
CROCHET HOOK
Size D/3 (3.25 mm); size C/2 (2.75 mm)
* This eBook involves crochet skills ONLY.
20 pages, 4 photos, 3 diagrams, 2 schematics, technical pages: Glossary, Terms, Conversion Charts, Yarn Care Symbol Chart, Yarn Substitution Chart.

And now, it’s a GIVEAWAY time!! One lucky one from anywhere in the world will win: 5 balls of Omega Trigo to crochet such sweet Hugs of Love Blanket or even Fluffy Clouds Blanket or Silverlace Blanket from Imagical Seasons, Summer book! All these 3 blanket crocheted with 5 balls of Omega Trigo – I just love yarn for delicate baby projects ;o)


…my new two babies—crochet pattern books Imagical Seasons: Crochet Couture for Kids 2-12:
- Spring, volume 01 (Hugs of Love and Tutti Frutti Blankets are a part of Spring Book, so you can get a book spirit by download the pattern ;o))
- Summer, volume 02.
A Winner will receive the books in both, paperback and PDF format!
“Imagical Seasons” is a series of 4 books and 38 whimsical designs that were inspired by nature and the changing seasons. Each volume, be that Spring, Summer, Autumn or Winter, will show you how a little imagination can:
- Transform simple ruffle pattern into a nearly endless variety of pretty designs (in Spring book).
- Stitch anything from a blanket to a halter dress using the same square motif with varying yarn weights (in Summer book).
- Adapt and personalize lace-pattern-based designs to hook your own masterpieces (in Fall book).
- Create trendy and cozy garments and accessories for those cold winter days, or a delicate coat for holidays and special occasions—based on patterns that apply variations of a simple puff stitch (in Winter book).
“Imagical Seasons” comes with lots of stunning full-page full-color photographs, very detailed written instructions that are easy to follow, and unique stitch diagrams that speak the international language of crochet.
All projects in these books are designed to spark your own creativity and will help you create charming hand-made treasures that will grow with your Princess and excite your creative spirit and imagination.
And here is the best part—garments come in sizes 2 to 12 years, and there are even a couple of themes for grown-ups!
Have fun with the projects and make them your own, because every little girl is special and deserving of gifts made with love!

TO ENTER THE CONTEST
Each person is allowed to enter up to 3 times as follows:
- Mandatory entry. Please let us know if you have any favorite crochet or knit stitches? My favorites are hdc, puff stich and picot for borders. Mainly because they are “reversible” and look great on both sides. Or just leave any comment here, on the blog—and that’s all, no any obligations ;o).
- Optional Entry #2. Blog about this giveaway, linking to this post and leave another comment to this post with link to your blog post.
- Optional Entry #3. Share this post on any of your accounts: Google+, Facebook, Ravelry, twitter, yahoo… etc and leave another comment here.
TERMS
- This giveaway starts today, November 30th and will end Sunday, December 6th, 2015 at 11:59 pm PST.
- I’ll select the winners with random.org’s random number generator and I’ll notify the Winners by email on Monday, December 7th.
Good luck everyone and lets fun begin!
And even MORE, I have a DEAL for you – this week only!

Books are the perfect holiday gift and this week only, get 30% off at my books in both paperback and digital formats + Free Tax (US) and Free Shipping (US) in my Shop at ImagicalSeasons.com, Etsy, Ravelry and Amazon – no coupon needed! PLEASE NOTE: If happens that Winner and purchaser is one person, I’ll make a full refund for sure! ;o)

_______________________
To enjoy more holiday deals from Alla Koval Designs, please visit my Etsy, Ravelry, Amazon and ImagicalSeasons.com (just scroll down Main page to locate deal’s board)!!
![]()
![]()
Underground Crafter with Marie Segares | Next Stop on the Imagical Seasons Blog Tour
| August 20, 2015 | Filled under Blog Tour, Giveaway, Marketing |

What an exciting news! Imagical Seasons Books Blog Tour has couple more stops and giveaways scheduled! Many thanks to Libby Butler-Gluck, for doing such a great job with this my very first blog tour! I appreciate a joy of working with you, Libby!
I’m very proud and honored to have the designers on board who have agreed to take their time to post about the books and hosting giveaways! Once again, my sincere thanks and deepest appreciation to you, wonderful and beyond talented Amy Solovay, Faina Goberstein, Gwen Blakely Kinsler, Kathryn Vercillo, Kara Gunza, Simona Merchant-Dest, Sarah E. White, MaryJane Hall, Vendula Maderska and Jocelyn Sass for participation, awesome reviews and such valuable input in my book’s blog tour!! I very appreciate it!!
I am absolutely thrilled to let you know that today’s stop on the book blog tour is at Underground Crafter!
Marie is fabulous crochet and knitting blogger, designer, and teacher behind Underground Crafter. Marie’s patterns have been published by Crochetvolution, Crochet World, Entwine, Galler Yarns, I Like Crochet, I Like Knitting, Inside Crochet, KnitCircus, Kollabora, Love of Crochet, Love of Knitting, Pom Pom Quarterly, and the Quick & Simple Crochet booklet series. Self-published free patterns are available here, and you can find the rest of her patterns on Marie’s Ravelry designer page. She teaches crochet and knitting at several adult education venues in the New York City metro area and at regional fiber events. Marie’s blog features free crochet patterns, crochet and knitting book and product reviews, interviews with needle arts industry pros, giveaways, and more. In August, 2014, she launched the Creative Yarn Entrepreneur Show, a weekly podcast for indie business owners in the yarn industry.
Thank you for doing the interview with me on the book, Marie! Everyone has different types of questions to ask and I like that. I very appreciate you being part of the blog tour!!
To connect with Marie and have a chance to win a copy of Imagical Seasons: Spring, Vol. 01; Crochet Couture for Kids 2-12 and Imagical Seasons: Summer, Vol. 02; Crochet Couture for Kids 2-12 , in her giveaway, please go to Marie’s blog HERE. Thank you for stopping by and good luck!

New to my blog and did not hear about my new two crochet patterns books just published in July? Please visit ImagicalSeasons.com to find all the info and details. And below is a list of what you will find inside of each book
Imagical Seasons: Spring, Vol. 01; Crochet Couture for Kids 2-12:

Imagical Seasons: Summer, Vol. 02; Crochet Couture for Kids 2-12:

_____________________
Find Imagical Seasons books at:
![]()
![]()
![]()
Imagical Seasons | Book Blog Tour begun!!
| July 13, 2015 | Filled under Blog Tour, Marketing, My Book, Publishing a book |

I am so excited to let you know that my-very-first blog tour for my-very-first two books begun! We worked so hard to prepare this event, and I am very happy to see it started!
Wonder what is a blog tour?
A blog tour is a virtual tour to help an author to promote his book without traveling. It’s the same concept as going to one physical store on Monday and then to second score in different city on Tuesday and then fly to Europe to run third event on Wednesday and so on but instead of physical places, the author is going from blog to blog during the time frame of the tour.
My sincere thanks and deepest appreciation to all wonderful and beyond talented Amy Solovay, Faina Goberstein, Gwen Blakely Kinsler, Kathryn Vercillo, Kara Gunza, Simona Merchant-Dest, Sarah E. White, MaryJane Hall, Vendula Maderska and dear Jocelyn Sass for participation in the blog tour!!
Below is the schedule of all the stops along with the dates by each blog. Each blog is hosting GIVEAWAYS and SPECIAL DEALS for Blog Tour Participants:
July 13: Knitting and Crochet – Amy Solovay
July 14: Faina’s Knitting Mode – Faina Goberstein
July 15: Crochet Queen: Royal Ramblings – Gwen Blakely Kinsler
July 16: Crochet Concupiscence – Kathryn Vercillo
July 17: Petals to Picots – Kara Gunza
July 18: Stylish Knits – Simona Merchant-Dest
July 19: Craft Gossip – Sarah E. White
July 20: Positively Crochet – Mary Jane Hall
July 21: Magic with Hook and Needles – Vendula Maderska
July 22: Cute Crochet – Jocelyn Sass
Some people think of “13” as a bad number, but I do believe in opposite as everything “13th” was good for me and I always thought of it as my lucky number, so I hope it will be lucky number for my books too!
A lovely and happy Monday everyone!
Alla
______________
Find my books at:
![]()
![]()
![]()
Imagical Seasons | Spring & Summer Books Release + Giveaway!!
| July 1, 2015 | Filled under Giveaway, Marketing, My Book |

Yeah, the Spring and Summer books are arrived yesterday!!! I am so happy and exciting to announcing that today, July 1st 20015, is official release of my very first two books!!
I dreamed to release my books on my B-day (April, 21th), but it happened on Igor’s birthday instead – yes, today is birthday of my dear and lovely husband, my best friend in the world!!!
…And this evening we are expecting our friend from San Francisco, CA to spend 4 days in our sunny and oh-so-wonderful Seattle area! :o)
What a Day!!!! Not to mention that I am gladly busy with packing pre-ordered books (my favorite activity of the day!!) to be shipped late today/tomorrow morning, and listing books in my stores.

And to celebrate book’s release and one of my big dreams to come true…
First, get 10% off on any of these options:
Imagical Seasons | Paperback
get 10% off + Free Tax (US)
Imagical Seasons | Digital
get 10% off + Free Tax (US)
Imagical Seasons | Paperback + Digital
get 10% off + Free Tax + Free shipping
Use code YAY10 at checkout. The coupon is applicable to ImagicalSeasonsShop (will be updated tonight updated!) and Etsy (already running) stores.
Offer valid now through July 8th, 2015 midnight PST.
If you may have any questions or issues with applying coupons – please let me know.


On top of this sale, let’s have a GIVEAWAY! One Three lucky ones from anywhere in the world will win a Paperback + Digital copies of BOTH Imagical Seasons: Spring and Summer books! How exciting is that?! Oh, and cherry on the top – these is always a something-extra-must-have-and-who-doesn’t-like-surprises will arrive with your package ;o)
TO ENTER THE CONTEST
Each person is allowed to enter up to 2 times as follows:
- Mandatory entry. You have to leave any comment here, on the blog—and that all, no any obligations ;o).
- Optional Entry #2. Blog about this giveaway, linking to this post and leave another comment to this post with link to your blog post.
- Optional Entry #3. Share this post on any of your accounts: Google+, Facebook, Ravelry, twitter, yahoo… etc.
TERMS
- This giveaway starts today, July 1st and will end Friday, July 10 2015 at 11:59pm PST.
- I’ll select the winners with random.org’s random number generator and I’ll notify the Winners by email on Saturday, July, 11th.
So, what are you waiting for? Post your entries now and good luck to everyone!
______________
Find my books at:
![]()
![]()
![]()
My Books Arrived!!
| June 29, 2015 | Filled under Marketing, My Book |

What a surprise!! My books arrived about a week early than expected, I love my printers!! ;o) There are two pallets of books that are being shipped and reached Seattle terminal this morning. One for each title, Summer and Spring. They will be delivered to our home tomorrow between 11:00 am – 3:00 pm. Yay!!!
That also mean that today and tomorrow are last days for pre-orders. All pre-ordered books will be mailed and available for instant download July, 1st!
Official book release date is July, 1st 2015!! OMG, I still can’t believe it!!!! :o)
Have a lovely and happy Monday!!
Imagical Seasons Books Pre-Order Now!
| June 15, 2015 | Filled under Marketing, My Book |

YAY, it’s a Day! ;o) Pre-Orders for Imagical Seasons Spring and Summer books are started and available at ImagicalSeasons.com and Etsy!
Only little more time to wait, just less than a month and in the middle of July I will get printed books delivered and your signed book(s) will be shipped to you right away!
Pre-Order Deals
PRE-ORDER Imagical Seasons | Paperback
get 10% off + Free Shipping (US and Canada)* + Free Tax (US)*.
PRE-ORDER Imagical Seasons | Digital
get 20% off + Free Tax (US).
PRE-ORDER Imagical Seasons | Paperback + Digital
get 15% off + Free Shipping (US and Canada)* + Free Tax (US)*.
* US and Canada Pre-Order sales come with Price discount, Free Tax and Free Shipping. International Pre-Orders sales come with Price Discount, Free Tax and $5 discount for shipping. Shipping cost is defaulted to $15 ($20 minus $5 discount) and real shipping cost will be calculated for each international order; left-over money, if any, will be returned back to the customer on the day of shipping.

Once again, thank you so much my dears for your continued interest and endless support! You are the Best!!! I am extremely happy and excited that I did this project happened! May I wish the best of luck to this my new, or …. more-like-very-first baby ;o)
A wonderful and lovely week to you all!
Alla
ImagicalSeasons.com | Spring, volume 02
| June 11, 2015 | Filled under My Book, Publishing a book |

First, let me introduce ImagicalSeason.com – a new home for my coming and future books, news and whatever-we-decide ;o)
All pages are almost done. The only I still need is customize Shop, which use woocommerce plugin – great plugin, but with more then hundred options to be customized (not my favorite part of task for sure). Please take a look at my new baby and let me know how you find the site, how it’s clear and easy to browsing, etc.
And now, let’s go for Summer book details..

Bring your imagination to life with magical and playful designs for little ones in your life
Add a splash of color and fun to your child’s wardrobe with this adorable Summer collection! Discover the possibilities of seven whimsical designs inspired by invigorating sights and sounds of this beautiful season. This second volume of Imagical Seasons book series with its total 38 designs will swing you into the warmest time of the year with simple and versatile patterns to be transformed into a variety of creative options. You will learn how to stitch anything from a blanket to a halter dress using the same square motif with varying yarn weights! Enjoy Alla’s inimitable designs and discover how easy it is to add the cheerful and lively spirit to your child’s look.
Each pattern is designed to spark your own creativity and includes:
- Unique stitch diagrams that speak the international language of crochet.
- Detailed easy-to-follow written instructions and stunning full-color photos.
- Size ranging from 2–12 years, and there are even a couple of items for grown-ups, too!
With suggestions on how to adapt and personalize each design to make unique pieces, the projects in this book provide magical and charming hand-made treasures that grow with your Princess and stir young imaginations.
Allow your crocheting adventures to begin! Have fun with the projects and make them your own, because every little girl is special and deserving of gifts made with love!


Spring and Summer books are coming July, 2015!
Pre-orders: June, 15th.
A wonderful and sunny day everyone!
Imagical Season | Spring, volume o1
| June 10, 2015 | Filled under My Book, Publishing a book |

Bring your imagination to life with magical and playful designs for little ones in your life
Spring is a perfect season to have frilly fun and to treat yourself to this charming Spring collection! Discover the possibilities of ten whimsical designs inspired by spring tenderness and awakening.This first volume of Imagical Seasons book series with its total 38 designs will swing you into a new season with simple and versatile ruffled patterns to be transformed into a variety of creative options. Enjoy Alla’s inimitable designs and discover how easy it is to add the cheerful spring spirit to your child’s look.
Each pattern is designed to spark your own creativity and includes:
- Unique stitch diagrams that speak the international language of crochet.
- Detailed easy-to-follow written instructions and stunning full-color photos.
- Size ranging from 2–12 years, and there are even a couple of items for grown-ups, too!
With suggestions on how to adapt and personalize each design to make unique pieces, the projects in this book provide magical and charming hand-made treasures that grow with your Princess and stir young imaginations.
Allow your crocheting adventures to begin! Have fun with the projects and make them your own, because every little girl is special and deserving of gifts made with love!


Spring and Summer books are coming July, 2015!
Pre-orders: June, 15th.
A wonderful and lovely day everyone!

 Shopping Cart
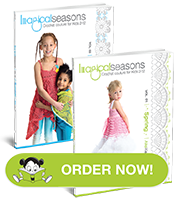


Lets Get Connected