How To Prevent “Bad Breaks” in Crochet & Knit Patterns. Formatting with InDesign CS5
| September 12, 2012 | Filled under Trade Secrets à la Koval, Writing a book |
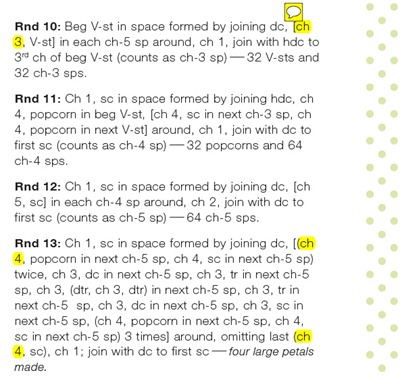
I worked of final editing of first part of book, and technical editor drew my attention (Thanks a LOT!!) that patterns may be easier to track if there is no line breaks between the instruction and the number, as you can see it below – "ch 4" should be on the same line.
Well, actually it’s not a mistake and you may not care, but I do. And if you are working in InDesign, to fix these “bad breaks” will take just couple minutes – so why not ;o)
BUT, first of all. I would NOT recommend to fix these breaks manually by inserting white spaces or forced line breaks (Shift+Enter/Shift+Return). Not only it will take plenty amount of your time (especially if you are working on 150+ pages long document, and here is no guarantee that you will find all instances where it happened), but also you may get new worse breaks as shown below.
- “Ch 3” break was fixed by applying forced line breaks:
- Then we added “see Special Stitches and Notes” and look what happened (see second line, plus we’ve got another bad break – “32 V-sts”)
To prevent “bad breaks” with InDesign CS5*, the trick is to turn all instances needed to “No Break” style.
*I’ll no wonder if older versions of InDesign or other editors have the same “No Break” style feature or something like that.
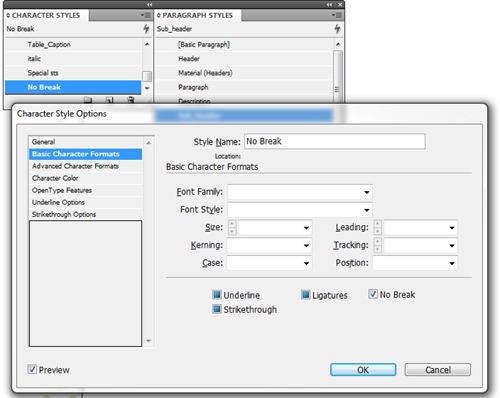
[dropcap]1[/dropcap] Create new character (Go to Type > Character Style (Shift+11) > Create new style).
Set up:
– Style Name: No Break
– check “No Break“ check-box
– click OK.
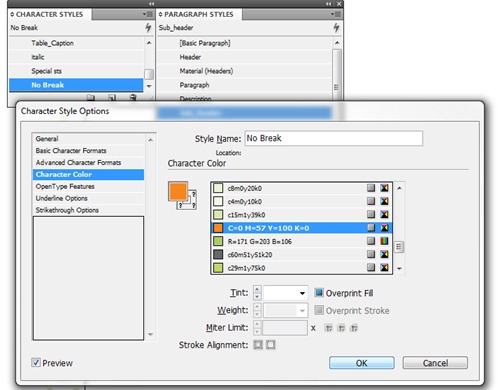
I also assigned Character Color to see these styles. I’ll change color before release:
So now you have a Character Style which will prevent InDesing from breaking words. You may apply it manually (select 2-3 words in the paragraph and assign Character Style to the selection) and see how it works. Simply add text before selection to push it to the right and see how it will “jump” to the next line as single block.
Next step is to force InDesign to find all the places like “Ch 3” or “ch-5 sp” and similar and apply “No Break” style automatically for you.
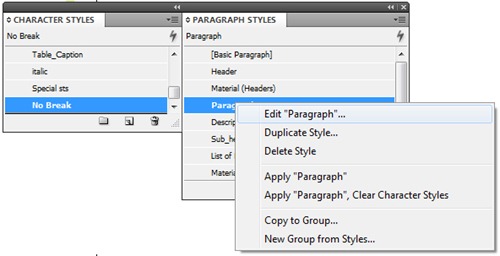
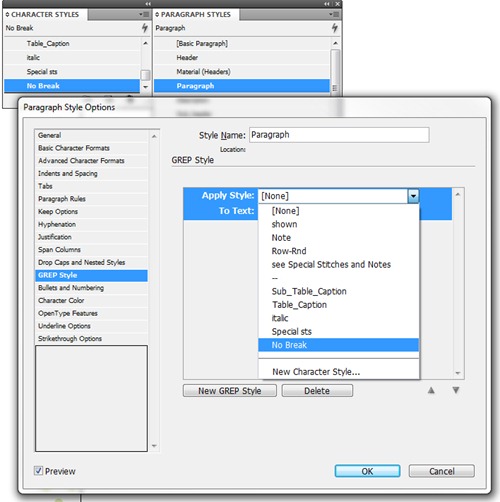
[dropcap]2[/dropcap] Go to Type > Paragraph Styles (F11) > Your Paragraph Name Style (my is Paragraph) > Edit Paragraph
[dropcap]3[/dropcap] The feature what we are looking for is called “GREP” and it is one of the Paragraph Style Options.
Go to GREP Style and click "New GREP Style”.
Set up:
– Apply Style: No Break
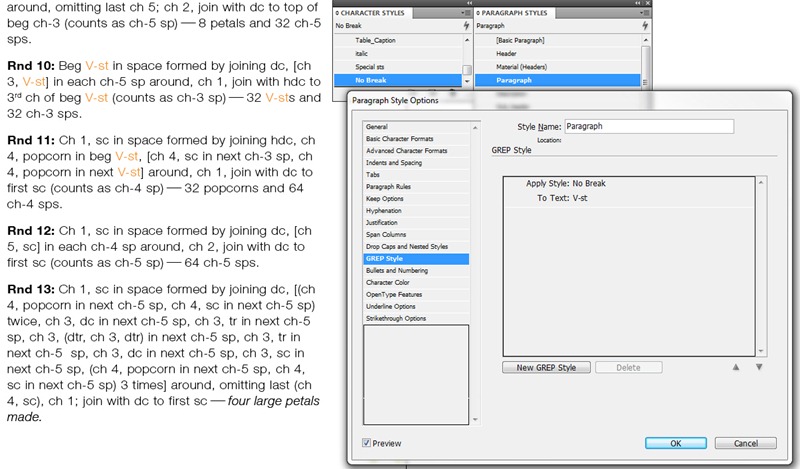
– type into the field To Text this text: V-st
– check “Preview” check box to verify results – all “V-st” are highlighted in orange, which means that they are in “No Break” style. And if you add extra text to force line breaks you can see that our “V-sts” issue is fixed. BUT “32” is now on the different line with “V-sts”, so our goal, to prevent line break between instruction and number, is not met yet.
[dropcap]4[/dropcap] To prevent line break between instructions and numbers,
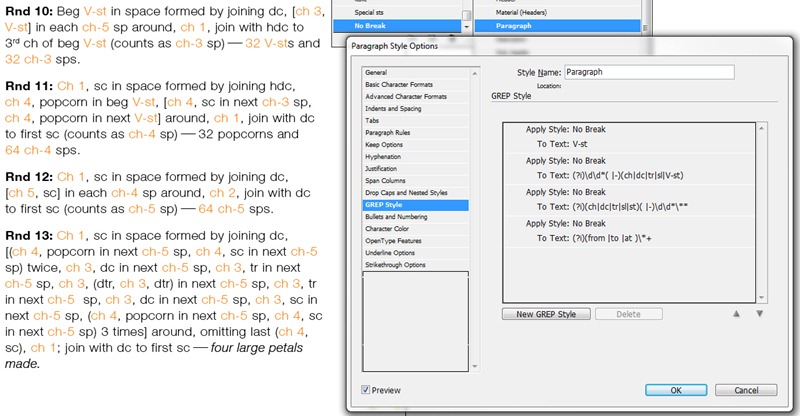
simple add 3 new GREP styles: just copy/paste these formulas (one per style, please ;):
(?i)\d\d*( |-)(ch|dc|tr|sl|V-st)
(?i)(ch|dc|tr|sl|st)( |-)\d\d*\**
(?i)(from |to |at )\*+
What above means is that:
– (?i) – means ignore case and treat capital or lower characters same way
– \d\d*\** – means one or more digits (followed by zero or many *)
– ( |-) – means one space or dash
– (ch|dc|tr|sl|V-st) – means ch, dc, tr, sl or V-st. You may add more to this expression, just separate sts with pipe |. Also please note that V-st has capital V but this doesn’t matter as we put (?i) to ignore case.
– (from |to |at ) – means “from “ or “to “ or “at “ including one space
– \*+ – means one or more *
So when InDesign will see a text matching one of defined expressions, it will apply selected style to that text:
AND that’s all & magic happened :o) Now you will have all corrections immediately as you type.
Then only thing you should be aware of – all that magic will work only in the selected Paragraph Style. If you have other Paragraph Style where you also need to block similar line breaks, you’ll have to add GREP Styles to that Paragraph Style also.
Oh, and make sure to change color of No Break characters back to regular one when you will find that everything work correctly and not least – before you send the document to the printer.
Another example is to apply bold style to all Rnds/Rows: at the beginning of each paragraph. For that, you can use this GREP Style:
^.*:
Which means:
– ^ – means beginning of Paragraph
– .* – means any character, zero or many times
– : – means, well it means itself – colon : ![]()
Enjoy!!
P.S.: BTW, did you hear about Adobe’s Creative Cloud? All Adobe applications are available for $49.99 a month in one year subscription, $79.99 per month without a subscription, or $29.99 a month for students and teachers for the entire collection of all applications, which adobe promises will be the latest version without ever needing to pay anything extra. If you want see if Creative Cloud is worth it, Adobe offers a free 30 day trial https://creative.adobe.com/plans.
Happy Thursday, everyone!!



 Shopping Cart


Lets Get Connected